



You might not realize how much money you're truly losing through leaks in windows and doors in your home.
While perhaps a chilly draft may seem like a minor inconvenience, those gaps force your heating and cooling systems to work harder throughout the year. Which means, every month, you're losing money.
Identifying where leaks are occurring is the first step. However, the treatment afterward needs some careful consideration.
Some leaks can be temporarily addressed with some DIY repairs, saving a bit of time and money. However, older or failing windows and doors often require a professional to handle it to avoid a loss in efficiency, making replacement the more cost-effective choice.
In the blog post, Rick MacDonald Siding and Doors will take you through some of the telltale signs of identifying drafty windows and doors.
Why Finding Air Leaks Should Be Your First Priority
Before you begin any repairs, it makes sense to find out where ALL the leaks in your home are.
While you may think you've found the main source, there's a good chance that, even in a newer home, the installation process of your windows and doors could have potential issues. The truth is that one door or window being drafty could imply there are issues elsewhere.
Of course, this can be very common in older builds, too.
Experts agree that there are several reasons why your home could be drafty. Some of the most common causes and solutions include:
Air leaks can develop around window and door frames, electrical fixtures, attic access points, baseboards, and other small openings throughout your home's exterior.
Homeowners can often reduce minor drafts by replacing weatherstripping, applying fresh caulking, improving insulation, or sealing visible gaps.
Addressing air leaks helps maintain a more consistent indoor temperature, improves energy efficiency, and reduces the workload placed on your heating and cooling system.
Looking for leaks and identifying them ensures you're not only living in uncomfortable temperatures or just saving money; it's an investment that ensures your home lasts well into the future. It also allows you to determine whether or not your air leak requires just a simple repair or a professional replacement to protect your long-term investment.
The Most Common Places Air Escapes
It's easy to say windows and doors are the most common areas where air escapes; we've broached the topic in previous blog posts. But it's also important to know the precise areas and aspects that can allow the air to escape.
Around the Window Frame
Caulking shrinks over time, leading to potential cracks and openings to the elements. It most often occurs because of moisture evaporation, even when applied fresh. Caulk contains a certain amount of water, and as it dries, that water escapes, causing it to shrink. Temperature fluctuations can also strain compromised caulking; when it's hot, the caulk expands, and when the temperature drops, it contracts.
Also, over time, sealants may crack, shrink, or separate due to prolonged exposure to heat, cold, and changing weather conditions, creating gaps where air can escape. The same goes for when gaps form around a window, either due to age, improper installation, or damage caused due to severe weather or general accidents.
Through Worn Weatherstripping
Weatherstripping will naturally compress and deteriorate over time, meaning it won't hold a proper seal and can allow air to escape. Weatherstripping is applied to both windows, doors, and even the drunks of vehicles to create an airtight seal. Naturally, this material will need to be replaced.
Between Windowpanes
If you notice insulated glass panes can be an indicator of seal failure. However, the tricky part here is that homeowners may not feel an initial or direct draft, but that doesn't mean the window's insulating performance hasn't been compromised.
Around Exterior Doors
Exterior doors are constantly exposed to near-daily use and changing weather conditions, meaning they are a common culprit when it comes to air leaks. As the door ages, components of its structure that normally create a reliable seal can wear down or even warp/shift, allowing air to escape and outdoor air to enter. Here are some key factors to consider when locating air leaks around exterior doors:
Door sweeps: You can find these along the bottom edge of the door, and as the name suggests, these components consist of bristles that keep out drafts, dust, and other debris where the door meets the threshold. If they become damaged, torn, or compressed, they can fail to provide an effective seal.
Threshold gaps: The door's threshold is designed to create a sight seal at the bottom of the door. However, as your home settles or components experience natural wear and tear, small gaps can develop and allow noticeable drafts and even moisture to enter.
Doors that no longer close tightly: A door that sticks, sags, or no longer latches securely may leave uneven gaps around the frame. This can occur due to worn hinges, shifting foundations, or warped door materials, all of which can contribute to ongoing air leaks.
Knowing where to look and what to look for can make it easier to determine how to address air leakage in your home. Especially if you're a new homeowner or unfamiliar with window and door repair.
Sliding Patio Doors
Aging rollers, damaged sliding tracks, and worn seals around sliding patio doors are common places you'll find air leaks.
How to Find Exactly Where Air Is Escaping
If you look at resources such as Natural Resources Canada, you'll see a myriad of tips ranging from drafting incense sticks around suspected areas and watching how the smoke moves and causes the tips to glow; while another suggests waiting for a cold day and feeling around for chilly drafts.
However, there are some additional tried-and-true methods and locations you can search for potential leaks:
Feel for Drafts by Hand
Generally, the back of your hand is more sensitive than the front, making it perfect for feeling around window frames, locks, door edges, thresholds, and corners. This is particularly effective on cold days, as well as during harsher weather.
NOTE: Always be careful around windows and doors if weather warnings are in effect.
If you feel a draft coming from any of these areas, note them down and keep them in your back pocket.
Use the Tissue Test
If you want to be certain that you have a draft, you can hold a lightweight tissue near suspected gaps and wait to see if airflow causes the tissue to blow gently. The more movement you witness, the more serious the air leak is.
Watch Curtains and Blinds
Keeping an eye on unexplained movement while windows and doors remain closed (especially when watching curtains and blinds) can indicate hidden drafts.
Check for Cold Spots
Walk around each room and check to see if you notice that certain areas feel colder/hotter than the others, especially if you have AC or heating running. Check every window and door to see if you can sense a significant temperature shift and make a note.
Schedule a Professional Inspection
If and when you've identified the air leakage, you can explain your findings to a professional who can help to pinpoint hidden issues using professional techniques. However, if you feel lost or out of depth (not all leaks are created equal, meaning they can be hard to detect), you can always request advice or a home visit.
DIY Fixes That Can Help (Temporarily)
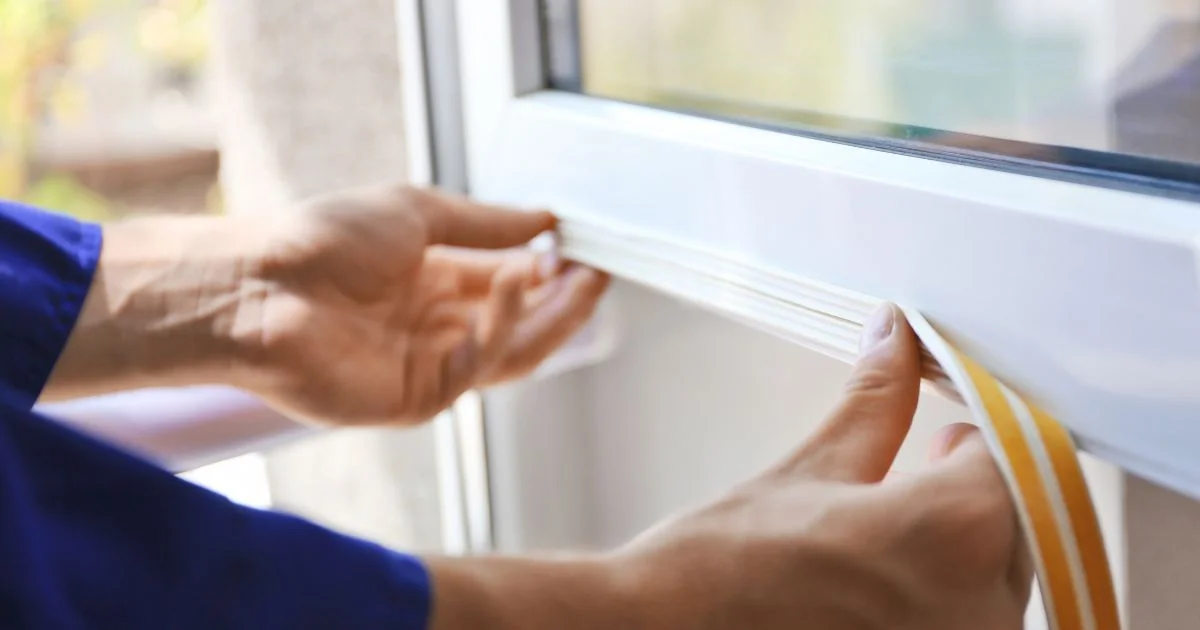
It is true that smaller drafts can be easy fixes. While this solves the problem in the interim, that doesn't necessarily mean that the problem is completely resolved. However, here are a few options you can take to address smaller issues involving air leaks for windows and doors:
Replacing Weatherstripping: If the weatherstripping is the problem, you can purchase replacement material and do a self-install. You can do this by removing the old/damaged material and cleaning the frame's surface. Then, measure and cut the new weatherstripping material and press/secure it in place. Make sure the door or window can close properly without any gaps or resistance.
Applying Fresh Caulking: Sometimes a caulking refresh is in order. To do this, remove the old/remaining caulk, clean and dry the surface THOROUGHLY, and apply a smooth, even amount at a 45-degree angle.
Installing a new door sweep: This may be a little more challenging if you’ve never done it before. Measure and cut the door sweep to match the width of the door. Position it along the interior bottom edge so the rubber seal lightly contacts the threshold, then mark the screw holes, drill pilot holes, and secure the sweep with screws.
Tightening Loose Hardware: Tighten loose screws, adjust the strike plate on doors, check window locks and keepers, tighten or adjust hinges, and test seals thoroughly.
Adjusting Door Alignment: Measure the door alignment first, then adjust the misaligned door by tightening the hinge screws and repositioning the hinges or strike plate so the door closes evenly against the weatherstripping. If the door has sagged, replacing the top hinge screws with longer ones can help pull it back into proper alignment.
While these fixes can reduce drafts temporarily, they cannot fully restore the maximum insulating performance of aging or failing windows and doors. If this is the case, there simply isn't a replacement for a professional to come in and handle the job.
Signs Replacement (and Professional Assistance) Is the Better Option
So, you know to identify and temporarily remedy the problem. But what do you need to consider before you decide to seek professional help and the complete replacement of your windows or doors? Let's look at some of the telltale signs that you need a professional to come in:
Drafts return Shortly After Repairs: This means the repair you tried either wasn’t done correctly or didn’t address the entire issue. This isn’t always a homeowner’s fault; rather, it’s an indicator that more help is required.
Condensation Between Glass Panes: If you continue to notice condensation between windowpanes, even after attempting a DIY fix, your windows likely need to be replaced by a professional.
Rotting or Damaged Frames: Rotting frames are no joke. If you notice any signs of rot around your windows and doors, then you need to contact a professional immediately.
Windows that Stick or Won't Lock Properly: Non-functional windows isn’t likely a problem that you can fix yourself. If you struggle to open or lock them, it’s time to call.
Warped Exterior Doors: By the time an exterior door begins to warp, there’s little to nothing you can DIY to fix it.
Noticeably Higher Energy Bills: If you’ve tried to DIY the problem and your bills are still too high or even climbing, calling a professional is the best option. While it comes with an upfront cost, it’ll save you bills in the future.
Finding the source of a draft is the first step toward improving your home's comfort and energy efficiency. While some air leaks can be resolved with routine maintenance, persistent drafts often indicate that your windows or doors are no longer providing an effective seal.
Before the next heating or cooling season, consider having recurring drafts professionally evaluated. Rick MacDonald Siding, Roofing, Windows & Doors can inspect your home's exterior, identify where air is escaping, and recommend whether repair or replacement is the most effective long-term solution. Professionally installed, high-quality windows and doors can improve year-round comfort, lower energy costs, and help protect your home for years to come.